Thursday, February 29, 2024

Photoshop - Zombie Edits

Image result for zombie photoshop tutorial

Option 1: Zombie Edit


1) Load an image of yourself/willing partner into Photoshop

2) Make a few copies of your background layer

3) Adjust the colour of your image to remove reds/blues so that you are left with dark shades and greens.

4) Find images of rotting meat/flesh/bones and blend over your image

5) Find images of blood spatters/wounds to lay over your image

6) Find image of a cemetery, haunted house to use as a background


Wednesday, February 28, 2024

Photoshop - Simple Edits

 Touch up these images.


Part 1: Follow this Link and copy the image into Photoshop.

Use the "Spot Healing Brush Tool": select the tool and then click on the woman's zits.

Try the "Healing Brush Tool" to fix the woman's wrinkles.


Part 2: Follow this Link and copy the image into Photoshop.

Use the "Patch tool" to cover up the yellow "number 1 sign"

Use the "Lasso tool" to draw a circle around an item you wish to remove. Select "edit - Fill" and select "content aware" to magically replace the item.


Tuesday, February 27, 2024

Photoshop - Adjustment Layers - Making colours "pop"


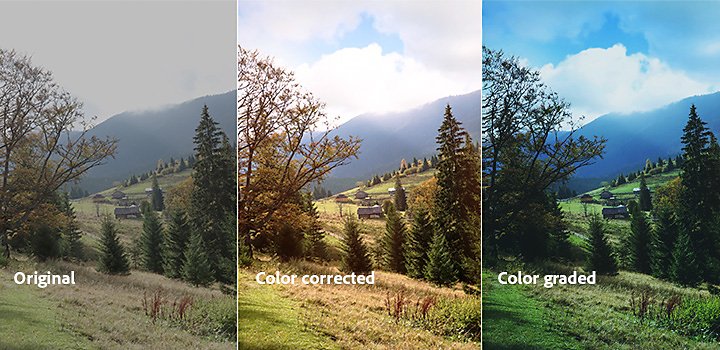
Creating an image with rich contrasting colours sometimes requires some "correcting" and "grading".

Colour Correcting: Adjusting the colours in your photo to match the real world.

Colour Grading: Emphasizing certain colours to create a theme or look.


Activity 1: Copy and paste the image above into Photoshop.


Click on the image's layer and then select the "Adjustment Layer" button at the bottom of the layers panel and select "Hue/Saturation"

Select colours to adjust one by one (red, yellow, green etc)

Slide the "hue" and "saturation" sliders to see how they affect the image.

Try using the "hand" icon to adjust colours by click on the colour in the image you wish to adjust and sliding the mouse left or right to adjust the saturation.

Post a "Before and After" copy of the image on to your portfolio.


Activity 2:

Take a camera and capture a landscape photo from somewhere around Brooks. 

Edit the colours of your photo and place a "Before and After" version on your portfolio.


Monday, February 26, 2024

Photography Activity - Action Shots and Shutter Speed


The camera shutter speed adjust how long the lens allows light to enter the camera.

The faster the shutter speed, the clearer a moving object will appear in your photo. This requires more light.

The slower the shutter speed, the more blurry a moving object will appear. This requires less light.


FREEZE ACTION SHOT

Picture
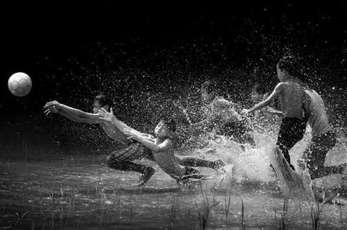
To freeze action and keep your moving subject(s) sharp you will need a fast shutter speed.  The faster your subject is moving, the faster your shutter speed will need to be.

1/250th of a second is usually fast enough to freeze motion.

1/500th of a second is fast enough to freeze a moving athlete.

1/1000 of a second may be needed for even faster subjects, such as fast moving vehicles.

MOTION BLUR SHOT

Picture
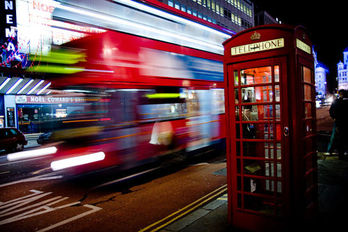
In a motion blur image, the moving subject should appear blurry, while the background remains sharp.

A slower shutter speed allows the subject to move while the camera is still recording the image, causing a blurred effect.  The slower your subject is moving, the slower your shutter speed will need to be to produce a blur.

Any time you are using a shutter speed of 1/30th of second or slower, a TRIPOD or Camera support IS REQUIRED.  This is because during that long of an exposure, camera shake will occur from hand-holding your camera.  This will produce an image that is blurry all over (not what we want!) instead of just the moving subject.

Activity: Take several shots which demonstrate your ability to adjust the shutter speed and capture an image
that is moving.

1) A person running in focus

2) A person running with motion blur

3) A person jumping in focus

4) A moving object in focus/ with motion blur


Post each image on your portfolio and list the shutterspeed you used.

Friday, February 23, 2024

Black History Month - Profile of a Black Artist


Robert Andre Glasper (born April 6, 1978) is an American pianist, record producer, songwriter, and musical arranger.


 Create a profile of a famous black artist.


Check out:

https://www.thecanadianencyclopedia.ca/en/collection/black-history-in-canada


or use another site of your choice.


Include:

Their name

Year they were born

Where they grew up

An image of them

Some examples of their art

T Shirt Design


Picture


1) Go to: threadless.com


Browse the T-Shirts and copy 2 shirt designs that you think are the best.


Create a blog entry which explains what you like about them.


2) Go to https://www.threadless.com/make/submit/


Check out the design challenges and weekly winners. Choose the challenge theme you would like to enter.


4) Download the design templates here: Create 2 different shirt designs and post them to your portfolio.


Thursday, February 22, 2024

App Review - Stop Motion Studio


App review:

Use the "Stop Motion Studio" app to create a short 15-30 second animation. Use any school object (pencil, eraser, student, book) as the star of your video.

After trying out the app, create a review on your portfolio which explains:

How difficult it is to get started.

How difficult it is to create the video.

How difficult it is to save/export your video to OneDrive and insert in to your Portfolio.

What ages would you reccomend to use this app.

What rating would you give the app (how many stars)


Wednesday, February 21, 2024

Media Issues Survey


Survey Link


Create a Shoe from a template


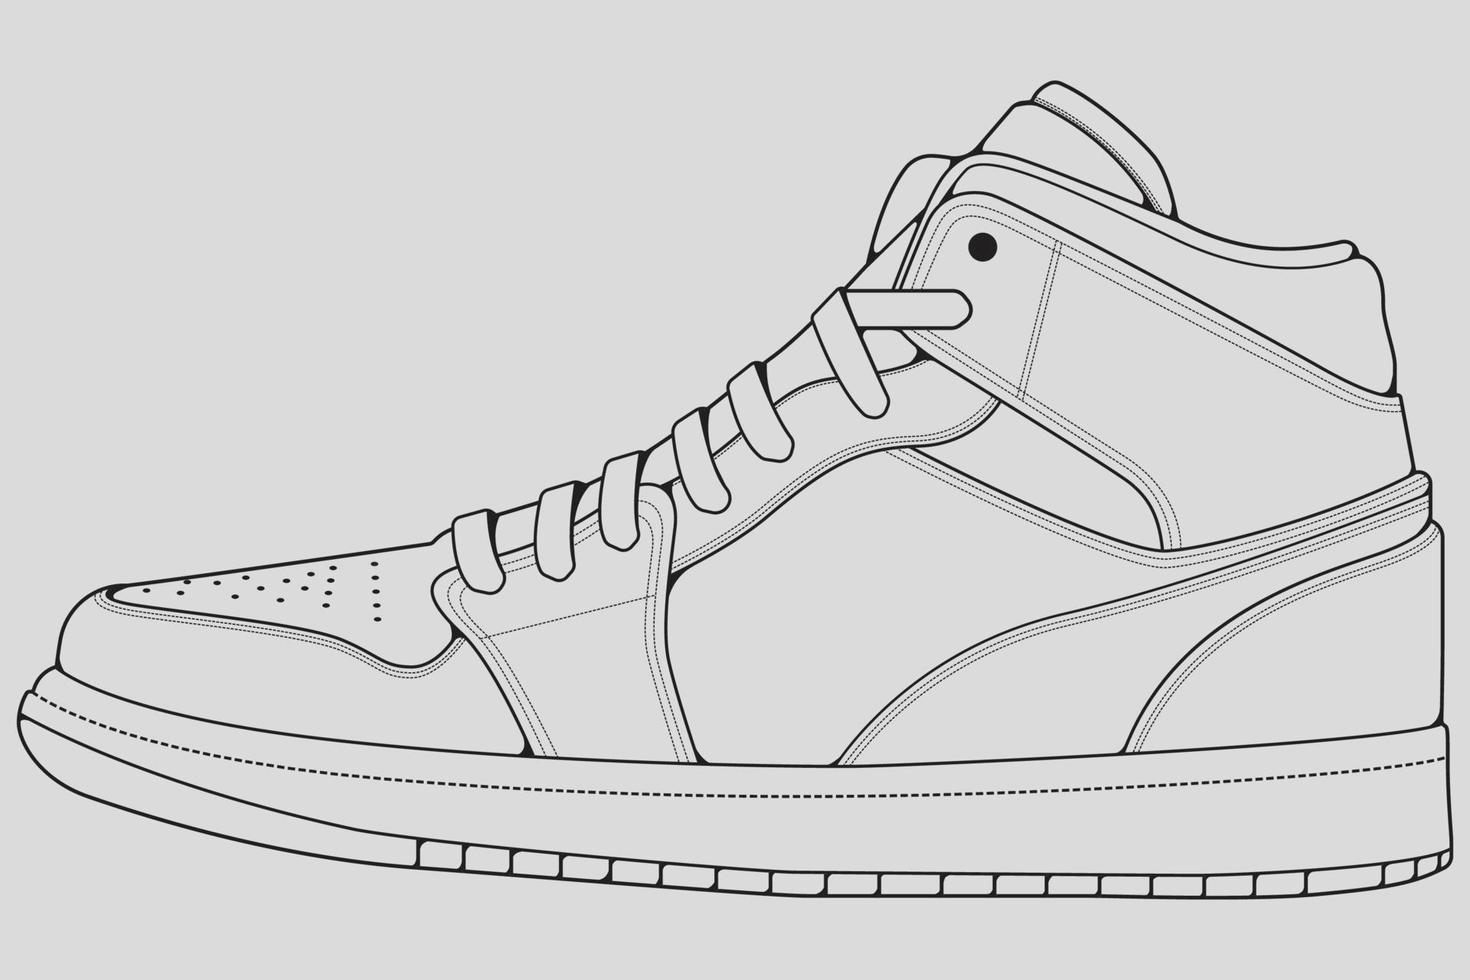
Create a custom shoe in Photoshop using a "Shoe Template".

Either use an image from above or do an image search for a "Shoe Template".

Copy the shoe template into Photoshop and then customize by adding colour, images, a logo or custom brushes.

Design a shoe


Try out two of the following Shoe Design sites to create custom shoes.


Use the snipping tool to save and post your designs to your blog with a brief summary of the design choices you made and which shoe you like better and why.


Converse - Link

Nike - Choose "Nike by You" under "Shoes"


Thursday, February 15, 2024

Photoshop - Custom Brushes

Create 5 custom brushes for your Photoshop projects

Open Photoshop

Import an image which contains a shape that would work well as a brush shape or stamp

Use a selection tool to select the shape of the brush you would like to make

Under "Edit" select "define brush preset"


Create an image which demonstrates all 5 of your presets

Try creating patterns, adding colours and applying filters


Canada Parks Poster


Create a poster for a Canadian National Park

Go to https://parks.canada.ca/ and click on a park of your choice

Do an image search of your park and find a quality iconic image to include on your poster.

Include a map which shows where park map is located and create a QR code using the link below which links to the National Park website.

https://www.adobe.com/express/feature/image/qr-code-generator


Tuesday, February 13, 2024

More Logos


Create a new version of each of the above logos.


Monday, February 12, 2024

Photoshop - Brooks Media Logo Design


Create a page of your Portfolio called "Logo Design"


Copy and paste THREE logos you like from sports teams, schools, businesses or phone apps.

What do you like about them? What makes them memorable?


Design TWO logos for the  "Brooks Media" program. 

A good logo will:

Show your ability to layer shapes, images and text.

Will use complimentary colours. (Coolors.co)


Friday, February 9, 2024

Activity - Brooks Media Dream Car


1) Go to

http://www.3dtuning.com/en-US/


2) Design at least 2 custom cars using the car tuner

3) Take a screenshot of your creations.

4) Load ONE of your car images in to Photoshop and add a custom Brooks Media logo.

Create a custom logo using Photoshop using text and shapes 

or

try


5) Add your custom car to your portfolio.


Thursday, February 8, 2024

Photo Editing - Black and White Portraits and Text Art

Text Art

Use one of your texture photos as a background for a logo.

Import your image into Photoshop. 

Use the "Eyedropper" tool to select a colour from your image. 

Copy the colour code into coolors.co and lock the colour. Press "Space bar" to find a swatch you like.

Add a layer to your project and add the text "Brooks Media"

Use the colours you chose from Coolors.co to create a logo.

Try different fonts, beveling, shadow, outline etc.


Portrait

Import your portrait into Photoshop.

Select the layer and open "Adjustments" and chose "Black and White"

Try different settings until you like the look of the image.

Try adding a layer and blending a colour image over your portrait. 


Photo Activity - Textures and Portraits

 Textures

Find as many textured surfaces as you can to photograph around the school. Make sure to hold the camera close to the surface and to focus the image. Aim to get 10 -15 different images.


Portraits

Capture a portrait of each member of your group. Place your subject in front of a plain background that is one colour.


Wednesday, February 7, 2024

Photoshop - Layer Masks


1. Load an image into Photoshop that you want to add flames or smoke to.


2. Add the flames image above, or find one online, and open the image into the above layer. Double click on the layer and try a few different "Blend Modes" to see what looks the best.


3. Select the flames layer and then add a layer mask.


4. Select the brush tool and the colour black. Brush the flames layer with black to reveal the layer below.  Try different brushes and shades of grey to remove the parts of the flames layer.

5. Click on the layer mask icon in the layer menu and look for the the "Feather" option in "Properties". Try adjusting the "Feather" slider to blend the images edges.


Tuesday, February 6, 2024

Photoshop - Smudge tool and blending layers

 Go to: www.coolors.co


Follow the tutorial to learn how to select a random colour swatch. Export a colour swatch as an image.


Load your swatch into Photoshop and create some art using the "smudge" tool. See below.


Import an outline of an image into a new layer and trace with the smudge tool.


Smudge tool in Photoshop
  • 1. Select the Smudge tool   (R) from the toolbar. If you can't find the Smudge tool, click and hold the Blur tool (  ) to show the other related tools, and then select the Smudge tool.

  • 2. Choose a brush tip and and blend mode options in the options bar. 

  • 3. Select Sample All Layers in the options bar to smudge using color data from all visible layers. Deselect the option to only use colors from the active layer.

  • 4. Select Finger Painting in the options bar to smudge using the foreground color at the beginning of each stroke. Deselect Finger Painting to use the color under the pointer at the beginning of each stroke.

  • 5. Click and drag in the image to smudge the pixels.

Monday, February 5, 2024

Photoshop - Erasing Layers - Animal Mashups


Image result for animal mashup


1) Download two images of animals you wish to mash up.

2) Load the first picture into Photoshop onto a blank canvas.

3) Add a second layer by selecting the "Add new layer" button in the bottom right corner of the window.


4) Use "Ctrl T" to "Transform" your second image. Resize and rotate the image so it lines up with the first image.

5) You can double click on a layer and adjust the "Opacity" to see through the layer. This will help you line up the images.

6) Use the eraser tool on the top layer to remove parts of the image you don't need

7) When the eraser tool is selected you can adjust the tool's settings in the top right corner. Change the size of the eraser for more precise work. Adjust the "Hardness" setting down to about "10" in order to blend the edges of your image.

8) Add the 2 starting images you chose to your portfolio as well as your final Animal Mashup image.

Friday, February 2, 2024

Photography Activities


 Check out the "Photography Activities" link on the right side bar of the class website. 


When you have completed ALL previous class activities see Mr. Clark for a quick camera tutorial so you can go capture some photos.

Thursday, February 1, 2024

FlipAnim

 Try out

https://flipanim.com/


Create a short animation using the app. Take a screenshot (use the Snipping Tool or shortcut Windows Key + Shift + S) and add to your portfolio or click "Save" to upload your creation and then download the GIF file to share.


Digital Art Inspiration


Find some inspiration by searching online for digital art blogs and sites.

Search "digital art", "digital photography" "graphic design" "graphic novels" etc.

Create a portfolio slide titled "Graphic Design Inspiration"

Copy 3 images to your post and include a link to the site that each came from.

Describe what you like about the images you found in a short write up

You must site at least 2 websites.